This is an old revision of the document!
Table of Contents
During the 2018 season, we hand-wired a little board to break out and debug the Digital I/O wiring to the break-beam sensor on our intake This project is about a PC Board to replace that, and for other DIO testing and wiring.
* Review DIO (Digital I/O) in the roborio digital IO section.
Here's a perfboard prototype and a sketch of what we're building (click for a bigger image):
We might or might not include the test button.

What's on this board:
- Connectors
- * Female 3-pin socket for cable to RoboRIO
- * Male 3-pin header to connect to switch, device, or sensor.
- Yellow LED indicates that power is present on the DIO cable. This is an instance of a Basic LED circuit
- Red LED lights when the signal is “low”, perhaps because it has been connected to ground by a switch or sensor. This is a slight variant on the Basic LED circuit
Not on the prototype, but hinted on the schematic: additional male headers. The break-beam sensor needs two things wired up: the source and the detector. Sometimes we won't install the actual headers, but will just solder individual wires into the holes - but we can still use the same fabricated board blank.
Schematic
Before reading this section and studying the DIO tester schematic, you might want to review:
- Introduction to Electrical Schematics
The schematic and board files for our design is in our github
We used this DIO tester design to start learning about how to do schematics and board designs; our printed circuit boards tutorial pages use this design as an illustration.
Here's a screenshot of the complete schematic:
On the schematic are:
- a basic LED circuit that lights up yellow if the +5v power is present and connected.
- a slightly modified LED circuit that lights a red LED if the signal wire is LOW (connected to ground)
- Four connectors: one socket for connecting to the RoboRio, and three headers for sensors.
The LED for signal-is-LOW
The Printed Circuit Board Design
We followed the steps in our kicad pcb layout to design the copper traces on the board.
Our first order of 6 boards was done at oshpark. The project is here: https://oshpark.com/shared_projects/UVZvYEPw
Building the Board
Here's our first assembled board, connected to a power source for testing. We used our fakerio digital input tester, but you could use a RoboRIO or any source of +5v power.
Another copy of the board was assembled differently, with the Break-beam sensor wires soldered directly to the board.
TODO: picture of this assembly.
Revision 2: Jan 2019
We made three minor changes to this board design for the 2019 competition season.
- add the text “2019 season” to the back of the board, to help identify which are legal for this season, and which were the 2018 prototypes. This will be handy next year too: boards built in previous years are fair game for off-robot testing and practice robots, but not legal for competition.
- add two tiny mounting holes. To avoid enlarging the board, these holes only accept #2 bolts. nylon hardware is recommended, as they're quite close to components
- add silkscreen labeling the three signals on the connectors “ground”, “signal”, and “+” power.
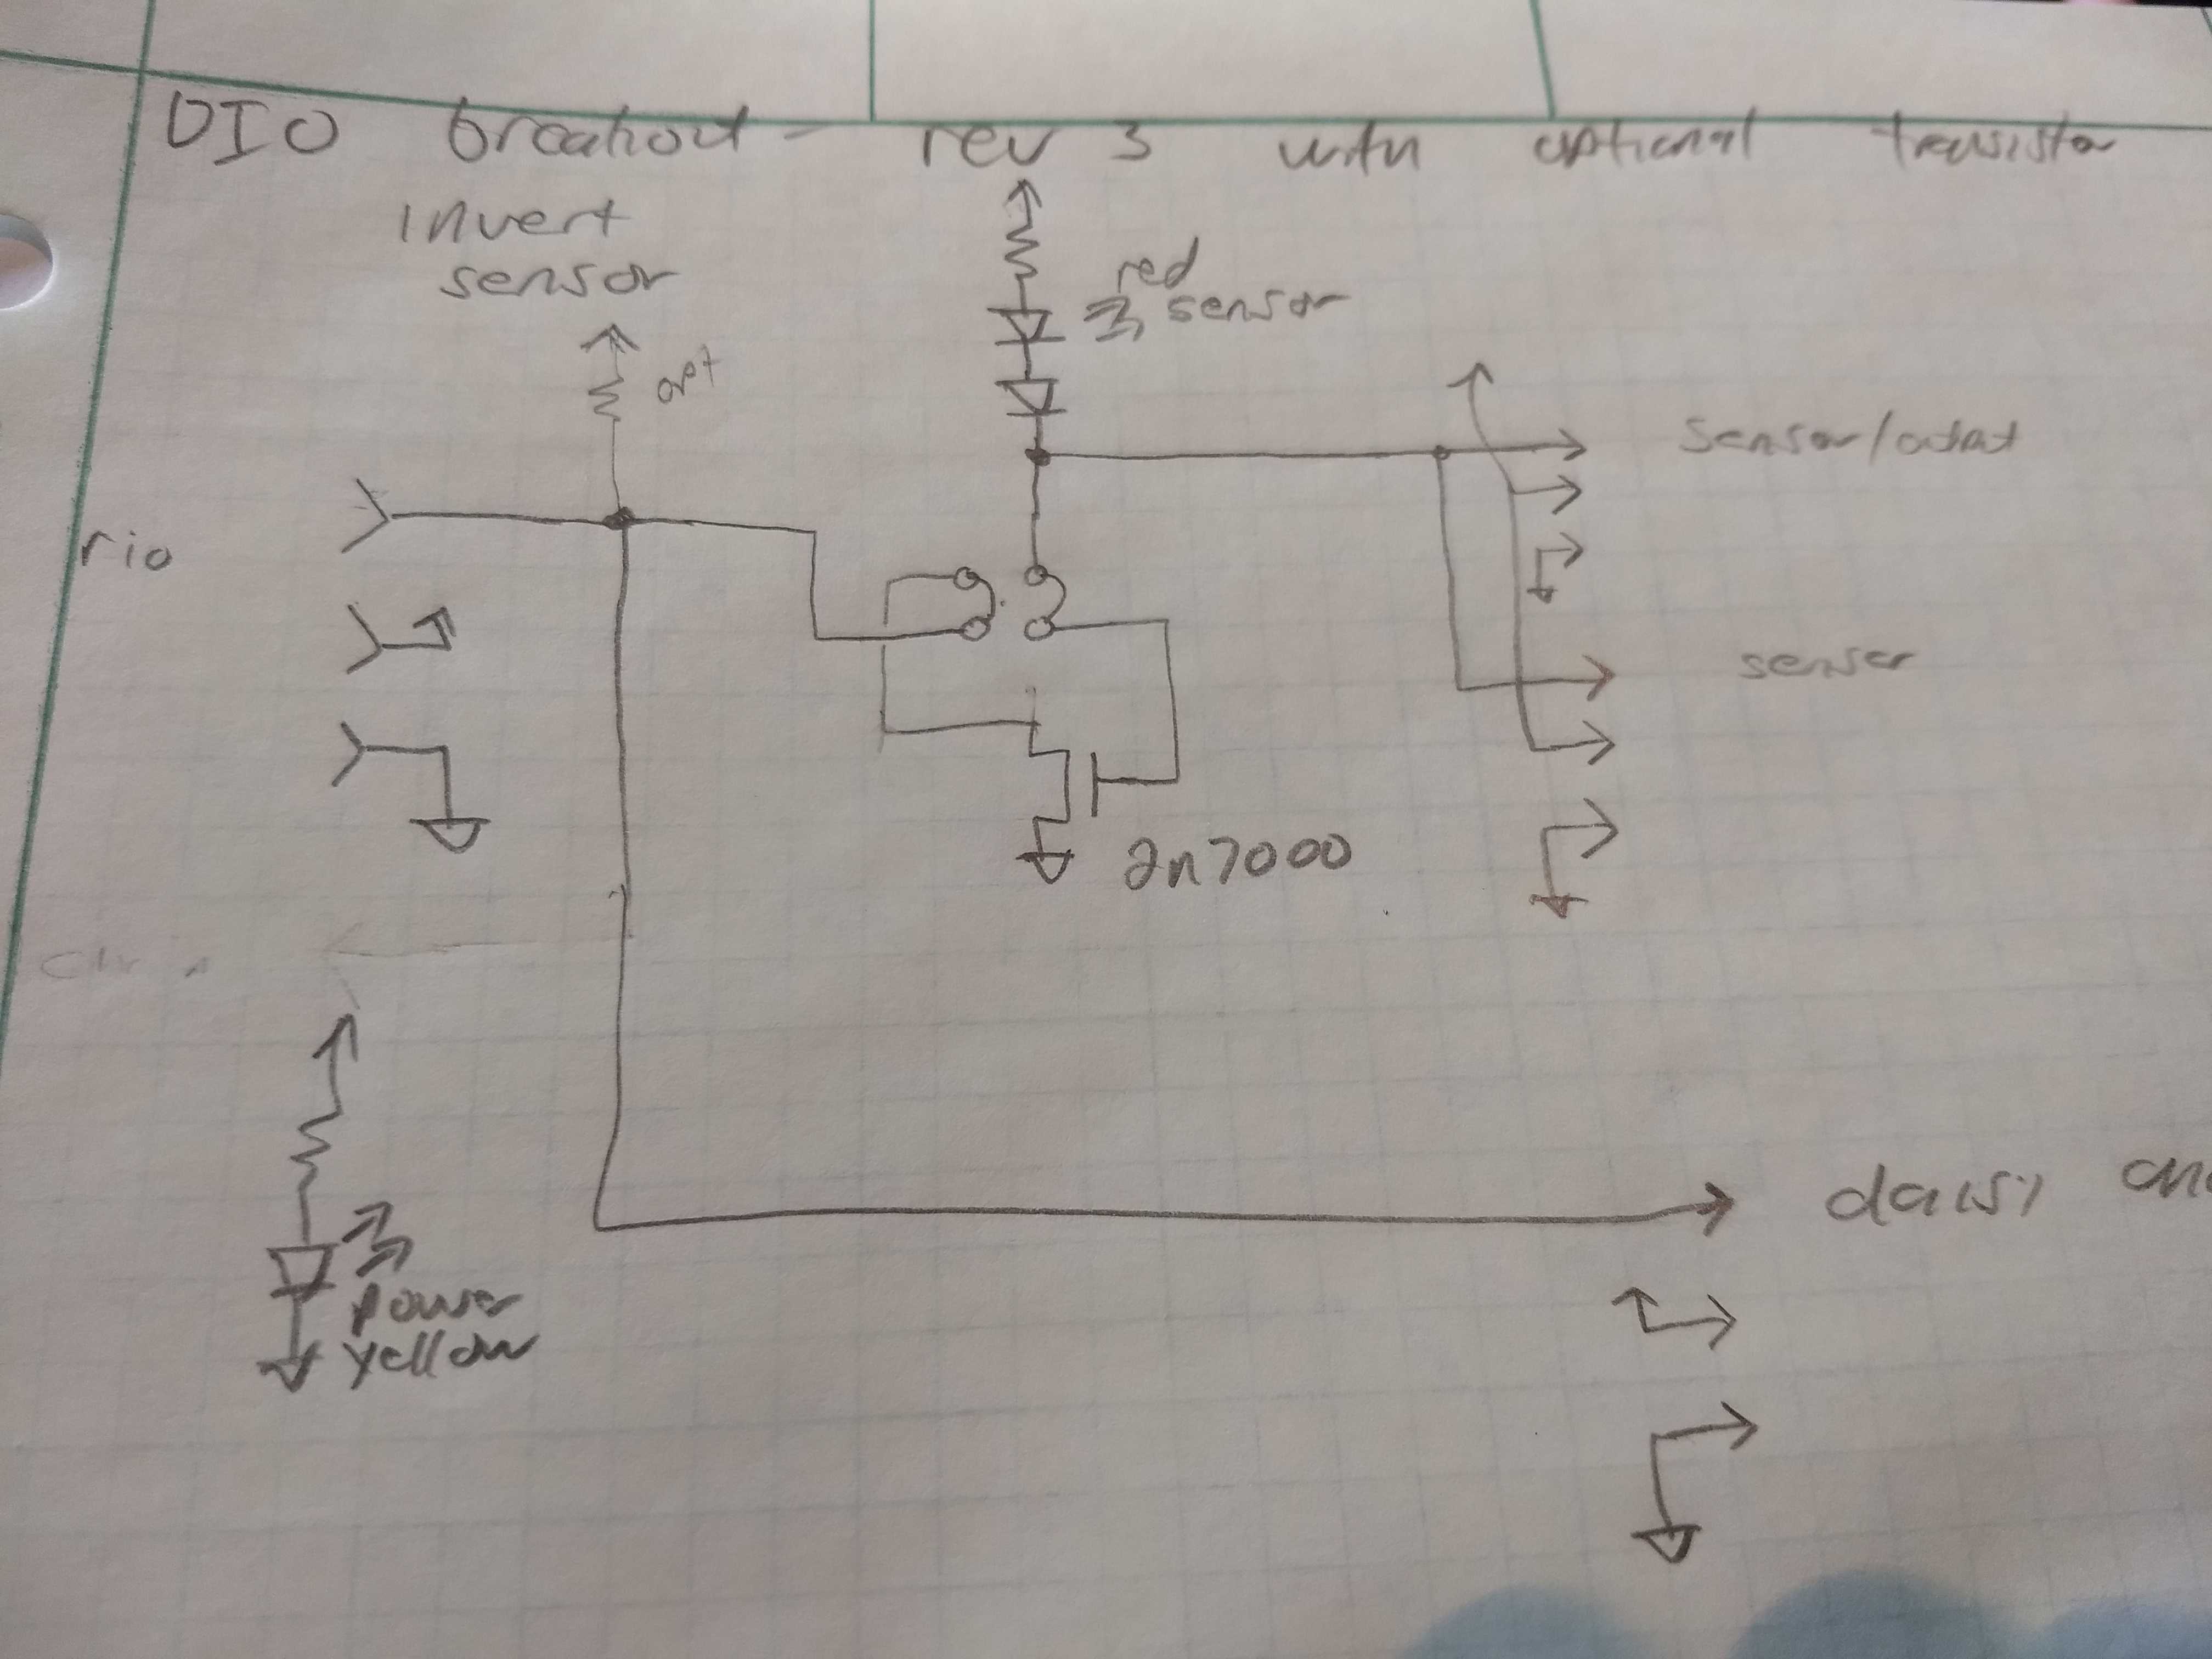
Proposed Revision 3: Feb 2019
A requirement that came up for the 2019 cargo sensor is to gate together the outputs of several infrared sensors. One way to do this is to invert each one, and then OR them together. A proposed scheme was to add the inversion to the DIO board used at each sensor, and then wire those inverted output together in a wire-OR configuration.
The proposed schematic is:
The 4-pin jumper assembly allows the 2n7000 mosfet to be omitted entirely (making a board compatible with the earlier versions. Alternately, it can be used to invert either an input or output signal. In boards where the mosfet is used, the pins for the sensor connections are seperated from the roborio connection and a copy that can be chained through to additional boards.
We might build this one, or might build a separate logic gate board. or both.


